gsettings set com.ubuntu.update-notifier show-livepatch-status-icon false-
Hide Livepatch indicator (tray icon)
-
Kotiboksi Bewan iBox A5100 (Arcadyan ARV4510EPW-A-LF-L3, valkoinen antenni) langattomaksi sillaksi OpenWrt 18.06.2:lla
Tässä on lähtötilanteena, että Kotiboksissa on jo OpenWrt 18.06.2, eli sen asennusohjeita joudut tarvittaessa etsimään muualta. Lisäksi oletuksena on, saatavilla on jo toinen reititin (alempana “gateway-reititin”) tarjoamassa langatonta yhteyttä lähiverkkoon (ja Internetiin). Tarvitset sen IP-osoitteen. Lisäksi tarvit tietokoneen (alempana “PC”), jossa on ssh-asiaksohjelma ja ethernet-liitin, sekä ethernet-kaapelin.
Teen tässä Kotiboksin neljännestä LAN-portista (WAN-portti) erillisen hallintaportin, jotta PC:n ja Kotiboksin IP-osoiteasetuksia ei tarvitsisi mulkata yhteyden säilymisen takia. Lisäetuna on, että sen jälkeen asetuksia on vähän vaikeampi saada niin solmuun, että niiden täysnollaus ja kokonaan alusta aloittaminen on tarpeen.
(Sovelsin tämän reseptin Karl Stenerudin Relayd Wireless Bridge in OpenWRT -ohjeista.)
Alkutoimet
- Palauta Kotiboksi (OpenWrt:n) tehdasasetuksille.
- Irrota PC muista verkoista (huom.: myös langattomista).
- Kytke ethernet-kaapeli Kotiboksin LAN1-portin ja PC:n välille.
- Avaa PC:n selaimella http://192.168.1.1/ ja kirjaudu pääkäyttäjänä (
root, salasana on tyhjä). System > Administration: aseta pääkäyttäjälle salasana.Save & ApplySystem > System: aseta aikavyöhyke ja valitseSync with browser.- Aseta mieluisa
Hostname. Save & Apply
Langattoman yhteyden luonti
Network > Wireless: SSID “OpenWRT”:EditAdvanced Settings: valitseCountry Code-valikosta FIWireless Security:Encryption: WPA2-PSK, syötä hyvä salausavainSave & ApplyNetwork > Wireless: SSID “OpenWRT”:Enable- Valitse radio0:n
Scan. - Kytkeydy gateway-reitittimen langattomaan verkkoon (
Join Network). - Syötä verkon salasana.
SubmitOperating frequency / Channel: autoMode: Client (huom.: pelkkä “client”, ei siis WDS Client)Save & ApplyNetwork > Diagnostics: varmista, että ping toimii.
Hallintaportin (etherwan) luonti
Network > Switch:Add- Ota VLAN 1:n
LAN 4-portti (joka onuntagged) pois päältä (off) ja luo uusi VLAN (nro 2) seuraavasti:
VLAN ID CPU (eth0) LAN 1 LAN 2 LAN 3 LAN 4 1 tagged untagged untagged untagged off 2 tagged off off off untagged Save & ApplyNetwork > Interfaces:Add new interface- nimeksi
etherwan Protocol: Static addressCover the following interface:Switch VLAN: "eth0.2"(eli edellä luotu VLAN 2)SubmitSetup DHCP serverIPv4 address: 192.168.100.1IPv4 netmask: 255.255.255.0Advanced Settings:Override MAC address: 00:11:22:33:44:56Save & Apply
Relayd:n (ja nettilediajurin) asennus
- Ota PC:n ssh-asiakasohjelmalla yhteys Kotiboksiin:
$ ssh root@192.168.1.1 # vi /etc/opkg/distfeeds.conf- Kommentoi pois
openwrt_telephony-rivi (viimeinen) (lisäämällä#sen edelle). Tallenna ja poistu. root@OpenWrt:~# opkg updateroot@OpenWrt:~# opkg install luci-proto-relay kmod-ledtrig-netdevroot@OpenWrt:~# exit
LAN-verkon osoitteenmuutos
- Irrota ethernet-kaapeli Kotiboksin LAN-portista ja odota että PC:n ethernet-portti hiljenee (unohtaa vanhan IP-osoitteensa).
- Kytke ethernet-kaapeli Kotiboksin WAN-porttiin (LAN4).
- Avaa PC:n selaimella http://192.168.100.1/ ja kirjaudu sivulle pääkäyttäjänä.
Network > Interfaces: valitse LAN muokattavaksi (Edit).- Vaihda
IPv4 address-arvoksi 192.168.2.1 - Aseta
IPv4 gateway-arvoksi gateway-reitittimen IP-osoite (useimmiten 192.168.1.1). - Valitse
Disable DHCP for this interface. Save & Apply
Siltaus
Network > Interfaces:Add new interface.- Anna liitännän nimeksi stabridge.
Protocol of the new interface: Relay bridgeSubmitLocal IPv4 address-arvoksi gateway-reitittimen osoite (sama kuin LAN-verkonIPv4 gateway-arvo) edellä).Relay between networks: lan ja wwanSave & Apply
Palomuurivyöhykkeiden päivitys
Network > Firewall: poista kaikki vyöhykkeet.Add- Anna vyöhykkeen nimeksi bridgezone.
- Aseta
Input,OutputjaForwardaccept-tilaan. Covered networks: lan ja wwanSave & Apply
Viimeistely
- Irrota ethernet-kaapeli Kotiboksin wan-portista ja odota että PC:n ethernet-portti hiljenee (unohtaa vanhan IP-osoitteensa).
- Kytke ethernet-kaapeli Kotiboksin LAN1-porttiin.
- Testaile PC:llä, että kaikki toimii niin kuin lopulta pitäisi.
- Sammuta Kotiboksi ja käynnistä se sitten uudestaan. Varmista, että kaikki toimii edelleen.
- Irrota ethernet-kaapeli Kotiboksin lan-portista ja odota että PC:n ethernet-portti hiljenee (unohtaa vanhan IP-osoitteensa).
- Jos PC:ssä on langaton verkko, yhdistä Kotiboksin langattomaan ja varmista, että kaikki toimii senkin kautta niin kuin pitää. Irrota PC lopuksi taas Kotiboksin langattomasta (ja muistakin verkoista).
- Kytke ethernet-kaapeli Kotiboksin wan-porttiin (LAN4).
- Avaa PC:n selaimella http://192.168.100.1/ ja kirjaudu sivulle pääkäyttäjänä.
System > LED Configuration: virittele LEDit mieluisiksi.
-
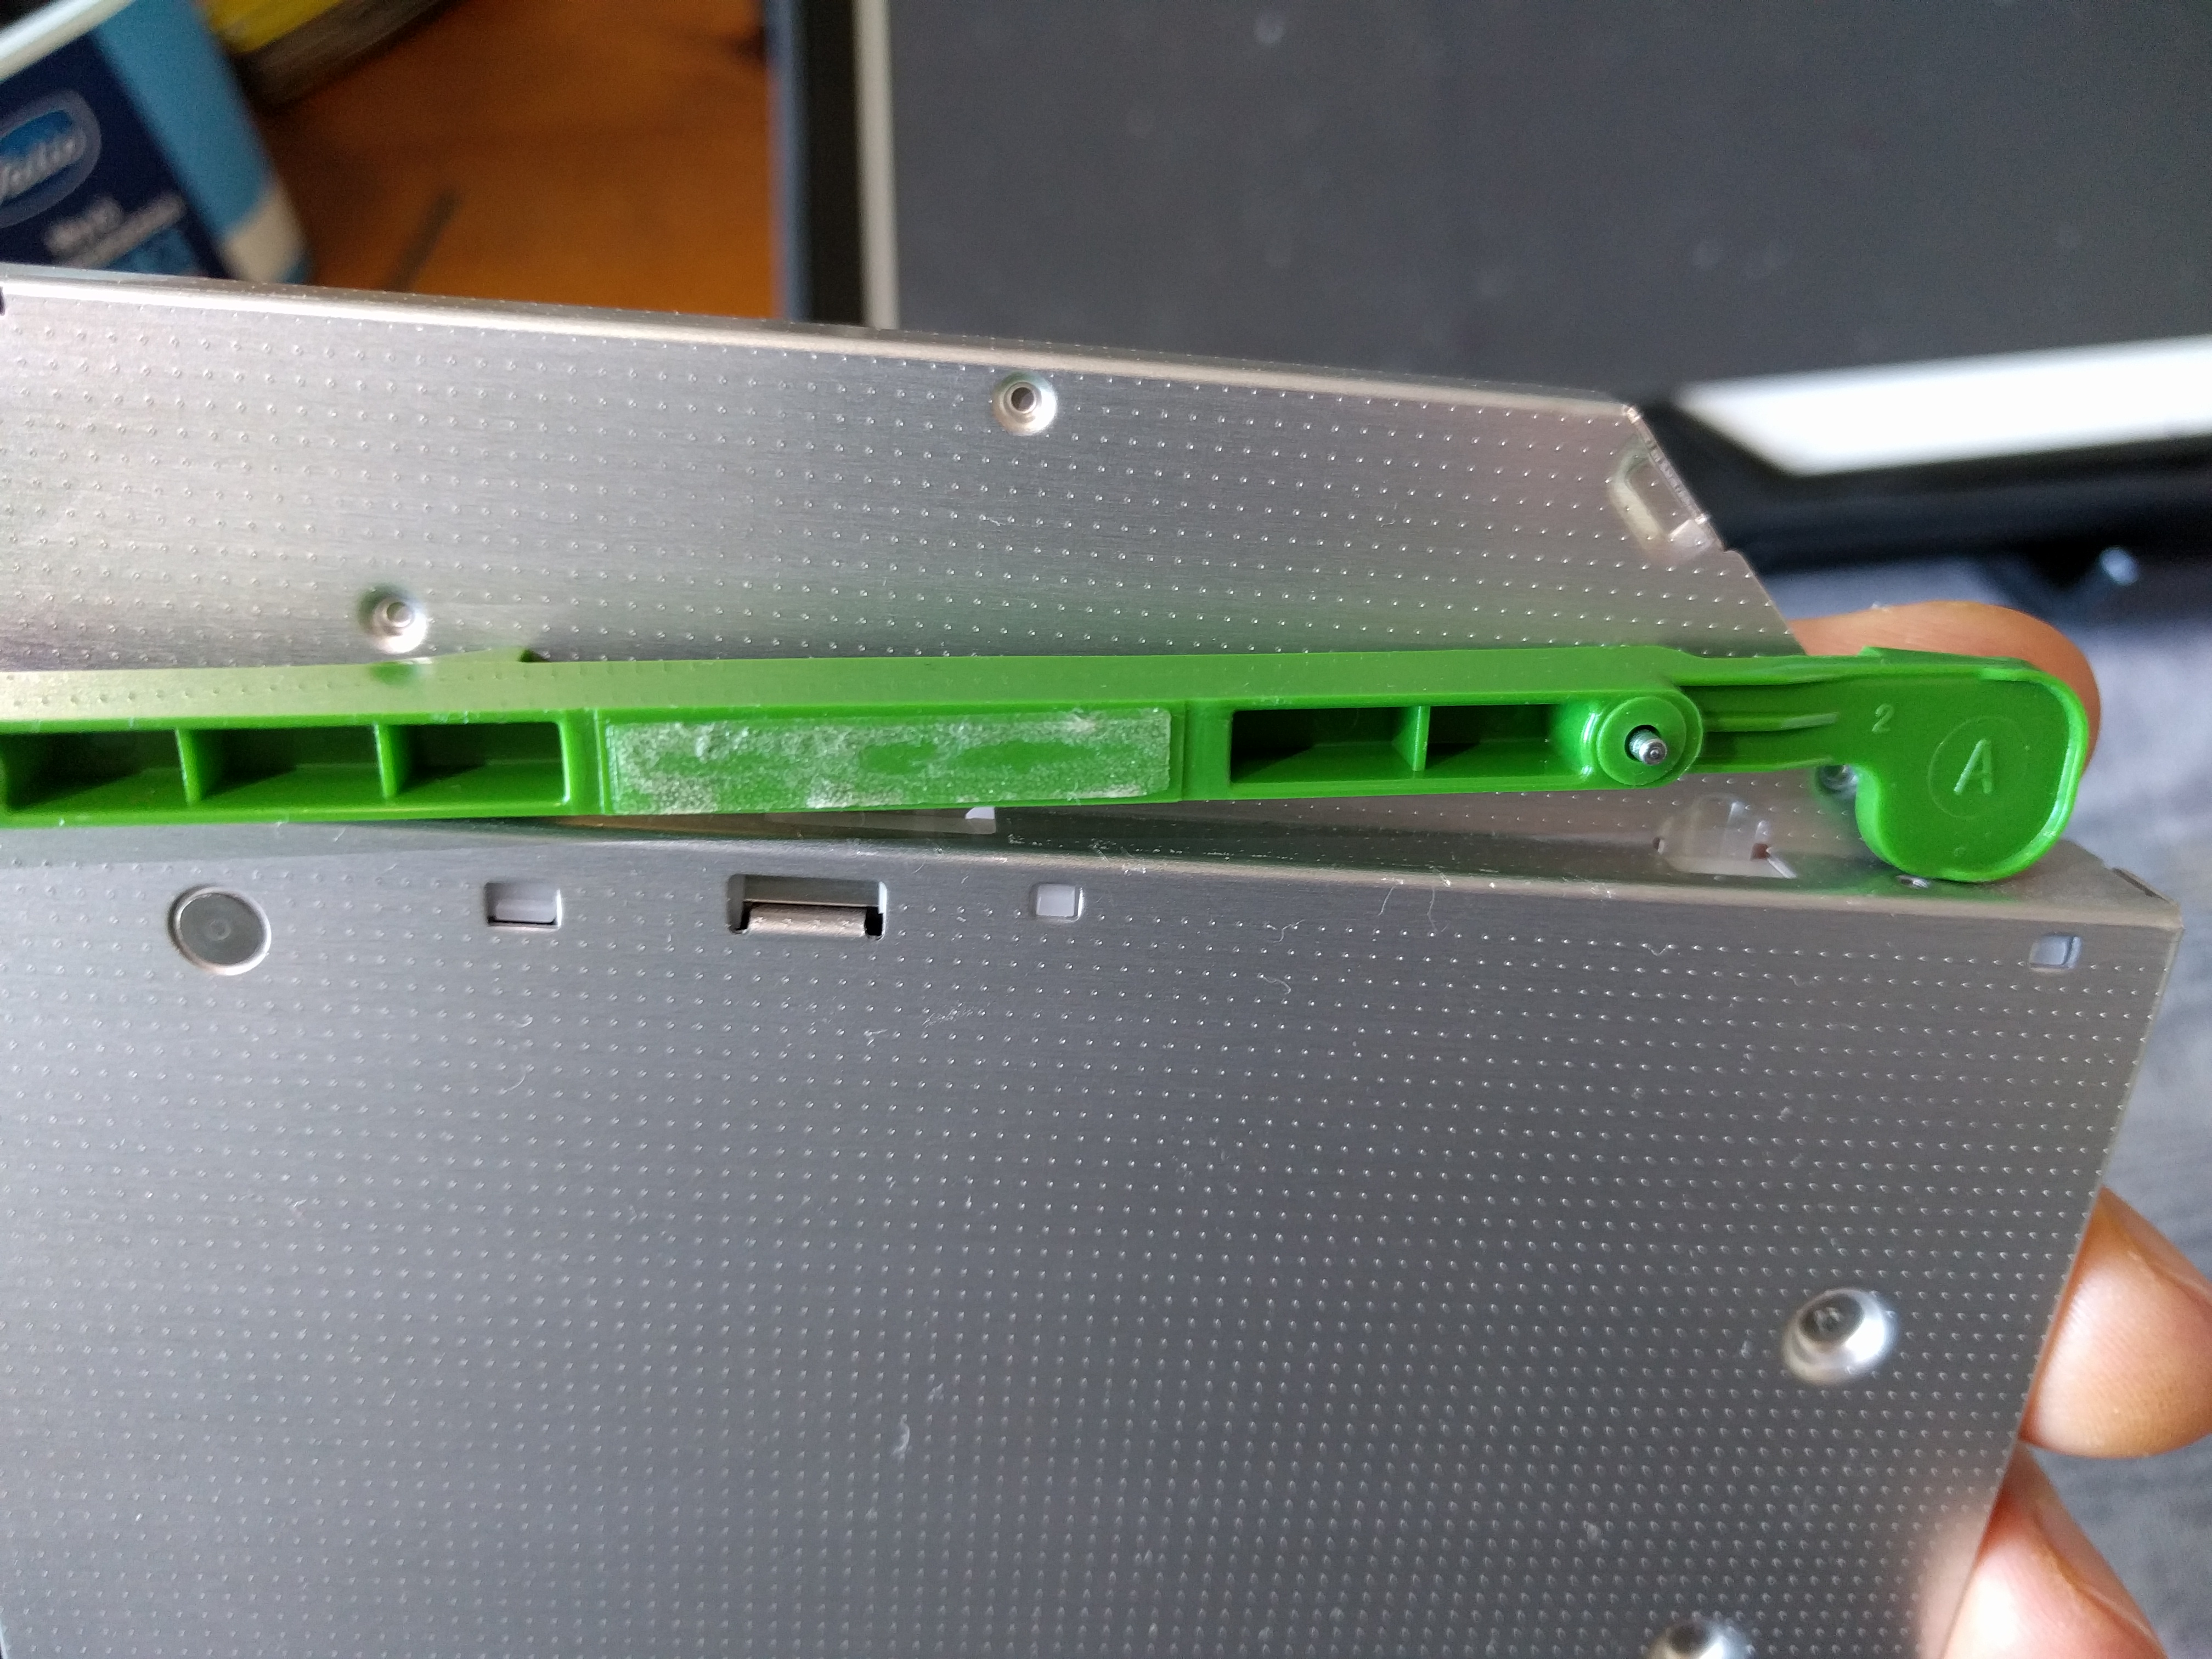
How to detach the green latch (P1-595349) used in some HP SFF computers’ slim optical drives
I’m talking about this:
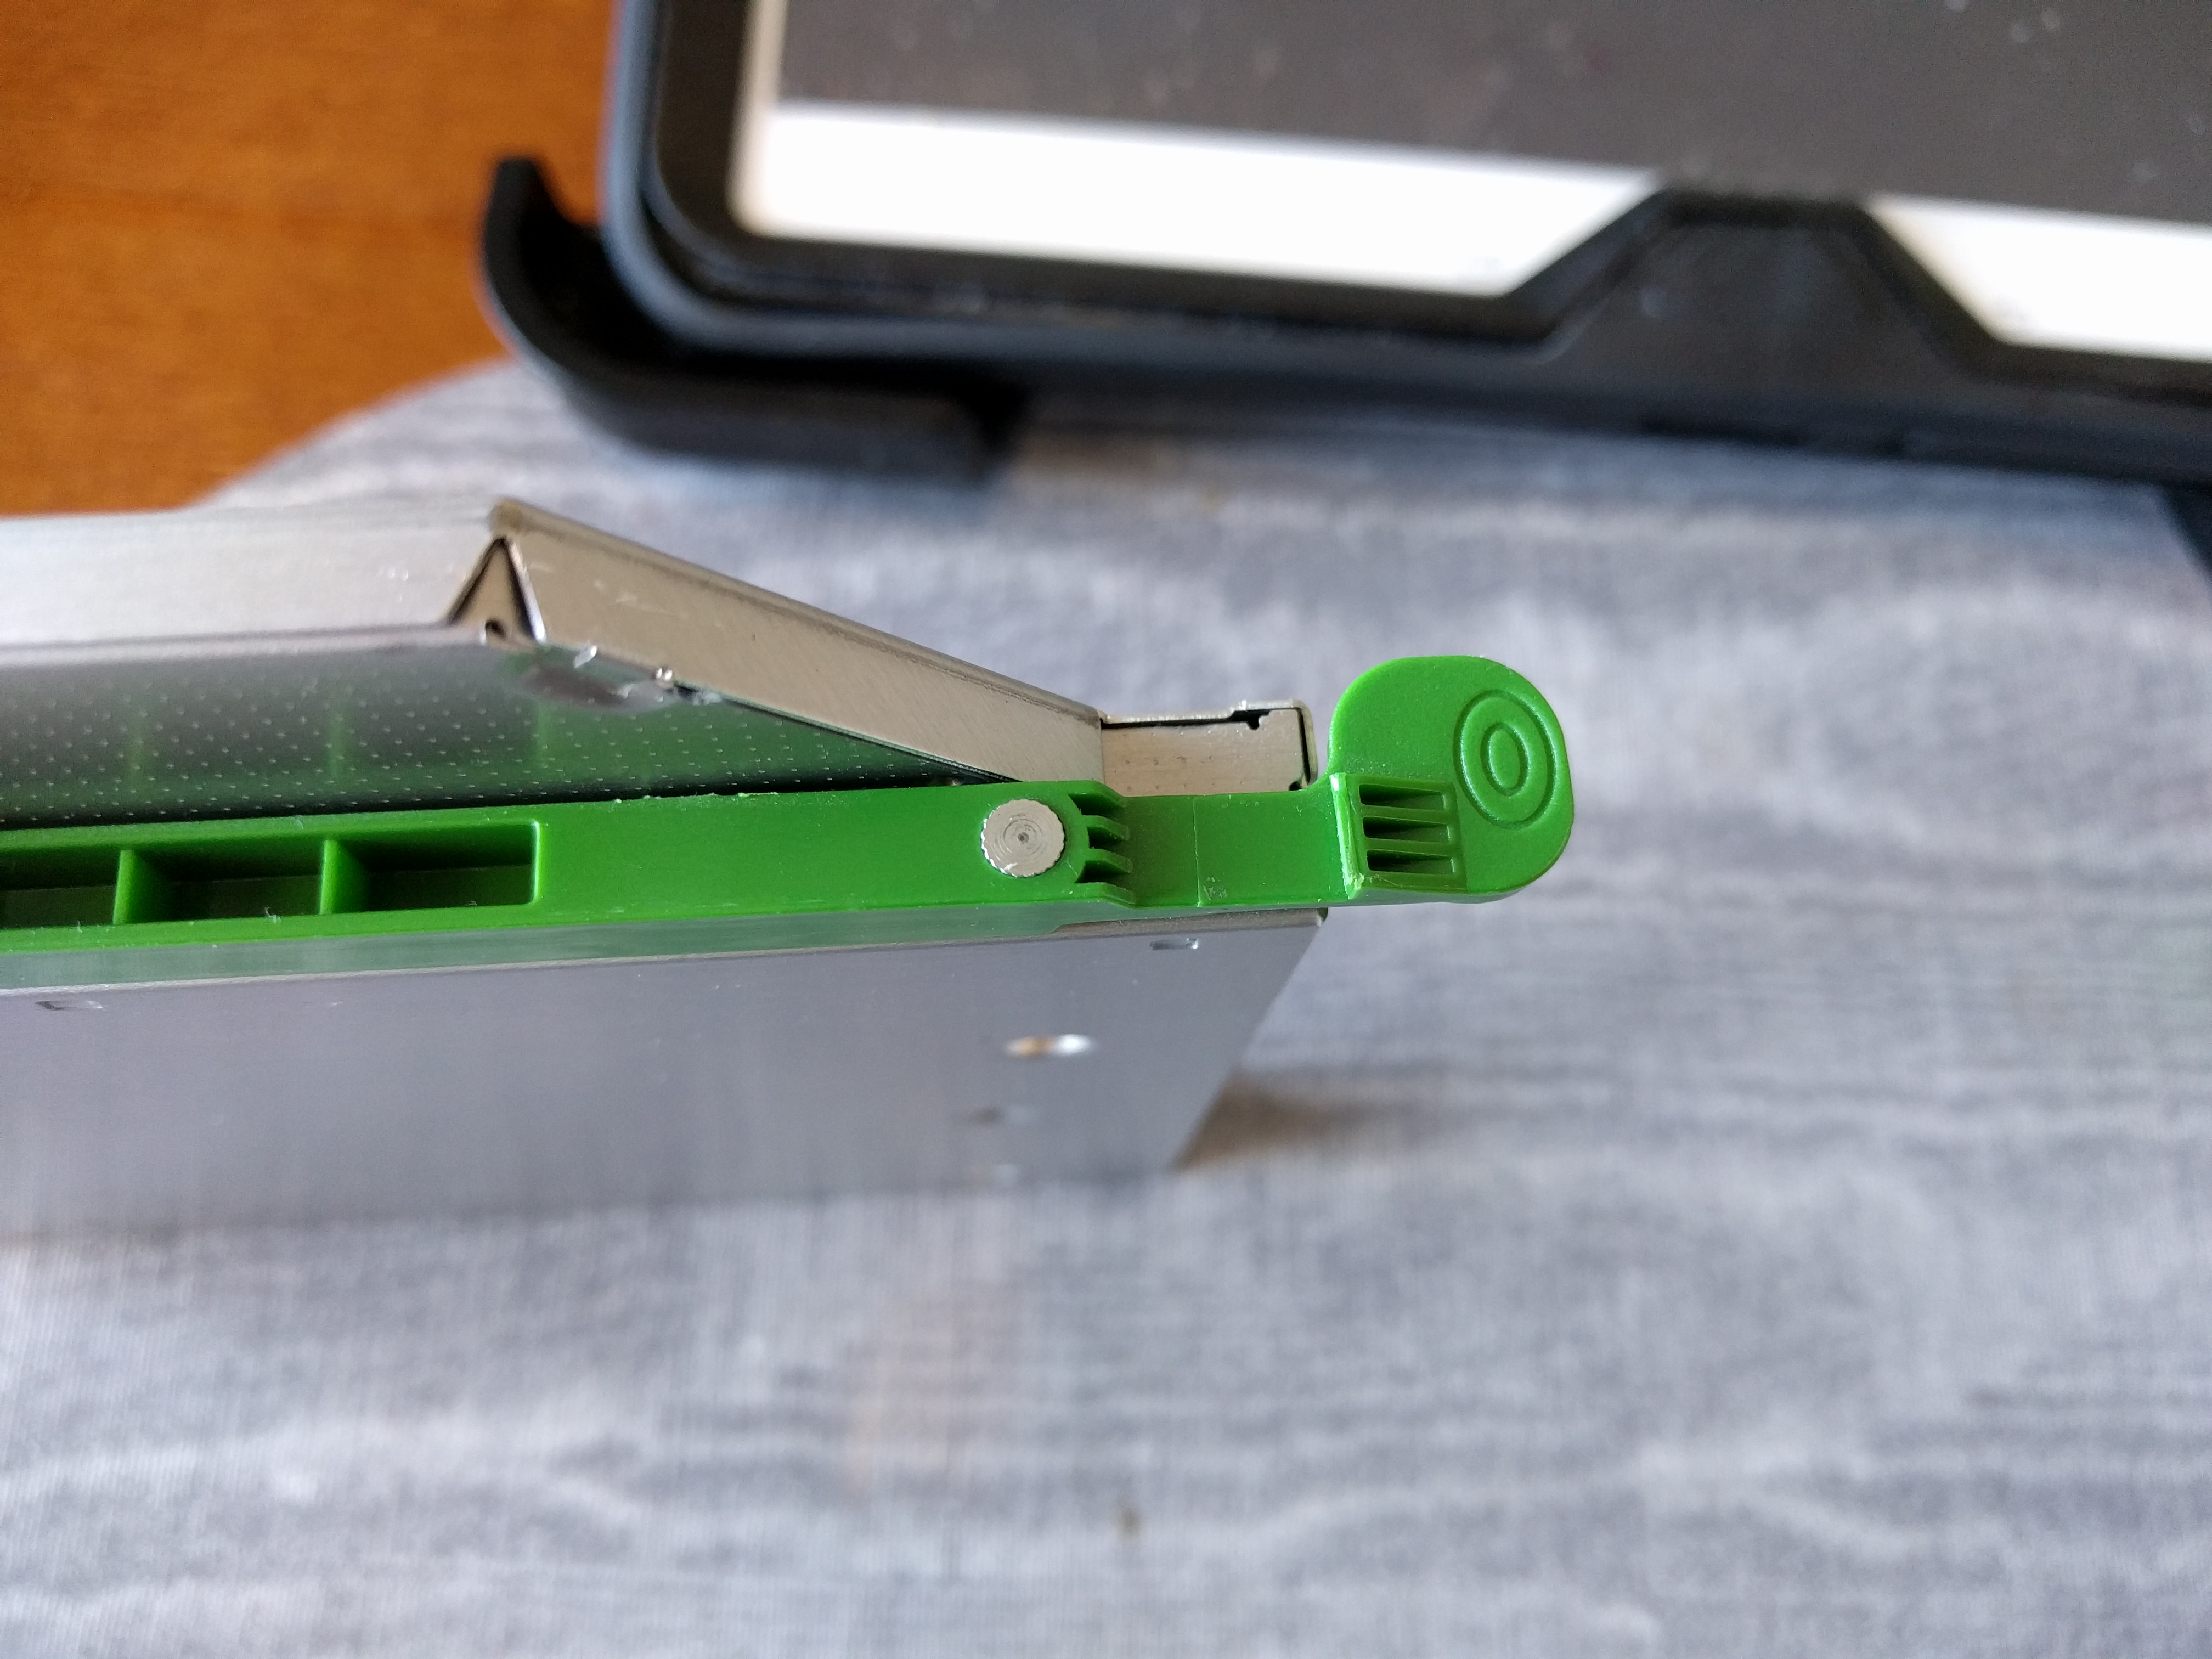
Now, forget about that weird screw head looking thing, it’s there just to guide the thing in place when they’re installing it, and to keep it from sliding off when in place.
The whole part is actually just kept in place by a small piece of adhesive in the middle. So there’s no need for a screwdriver at all here, as you can just carefully pry the damn thing off:
-
Change keyboard layout when booting Ubuntu 18.04 live cd/USB in UEFI
I’m selecting the Finnish locale and keyboard layout here, YMMV.
- With the Try Ubuntu option selected, hit ‘e’ to enter the boot parameter editor
- Go to the end of the line with linux kernel boot parameters (they perhaps end with
quiet splash --) and add these parameters:locale=fi_FI console-setup/layoutcode=fi(so that, if the previous example holds, it now ends withquiet splash -- locale=fi_FI console-setup/layoutcode=fi) - Hit Ctrl-x to boot
-
Apache 2.4: Require (allow) either (mod_auth_basic) valid-user or a specific query string
Prerequisities:
- Apache 2.4
- you have set up your htpasswd file in
/path/to/.htpasswd - the alternative, secret query parameter for access is
secret_access_parameter
To make it work, add these lines to the appropriate section of your Apache vhost configuration:
Require all denied <RequireAny> Require valid-user Require expr "%{QUERY_STRING} =~ /secret_access_parameter/" </RequireAny> AuthType Basic AuthName "Authorization required" AuthUserFile /path/to/.htpasswd -
Nautilus keyboard shortcut to deselect all
Ctrl + Shift + Aor, if that doesn’t work,
Ctrl + Afollowed byCtrl + Shift + I -
Rhythmbox podcast feed & episode download status codes
enum { RHYTHMDB_PODCAST_FEED_STATUS_HIDDEN = 0, RHYTHMDB_PODCAST_FEED_STATUS_NORMAL = 1, RHYTHMDB_PODCAST_FEED_STATUS_UPDATING = 2, RHYTHMDB_PODCAST_STATUS_COMPLETE = 100, RHYTHMDB_PODCAST_STATUS_ERROR = 101, RHYTHMDB_PODCAST_STATUS_WAITING = 102, RHYTHMDB_PODCAST_STATUS_PAUSED = 103, }; -
Switching Redis from TCP port to UNIX socket in Ubuntu 16.04, with Nextcloud running under Apache
This presumes that Apache, Nextcloud and Redis have already been installed, with Redis running on the default TCP port 6379 and Nextcloud is configured to use that port.
When switching from using a port to using a socket, any “Redis Server Went Away” issues that crop up in Nextcloud are probably due to file permissions: Apache’s
www-datauser needs access to Redis’ socket file inside/var/run/redis. Here’s the full list of steps I took to make it work:- open
${NEXTCLOUD_WWW_ROOT}/config/config.phpin a text editor - turn on maintenance mode by setting
'maintenance' => trueand saving the file - in the
'redis'array,- set
'host' => '/var/run/redis/redis.sock' - set
'port' => 0
- set
- save changes
- open
/etc/redis/redis.confin a text editor - change
port 6379toport 0 - uncomment
unixsocket /var/run/redis/redis.sock - uncomment
unixsocketperm 700 - change
unixsocketperm 700tounixsocketperm 770 - save changes
sudo adduser www-data redissudo systemctl restart apache2(for the added group to take effect)sudo systemctl restart redis-server- open
${NEXTCLOUD_WWW_ROOT}/config/config.phpin a text editor - turn off maintenance mode by setting
'maintenance' => falseand saving the file
There’s no need to change the value of
open_basedir, or to tweak Apache’s site configuration (but do remember step #12 above: restart Apache after addingwww-datato theredisgroup). - open
-
Redirecting Signal Desktop’s log from syslog to a separate file
After switching from the old Chrome app to the new Signal Desktop app, my syslog began to get spammed with lines containing stuff like “Sending a keepalive message”.
They seemingly come from gnome-session, but it’s actually Signal operating under gnome-session. Not having the actual application name for filtering, I just made a slightly hackish
/etc/rsyslog.d/20-redirect-signal.confwith the following contents::msg,contains,"{\"name\":\"log\",\"hostname\":\"saegusa\"" -/var/log/signal-desktop.log & stop(Where saegusa is my hostname; you should obviously change this to match yours.)
-
Get GIT_WORK_TREE from the post-checkout hook
I was crafting a post-checkout hook and wanted to do something depending on the absolute path of
$GIT_WORK_TREEin the current environment. In git 2.7.4 (and up to 2.4.14) at least, that environment variable was set to “.” when inside the post-checkout hook, which was a little unhelpful in this case. So I spent some time trying to google why and coming up empty.Here’s where you’re entitled to laugh at my over-thinking this.
Since I’m in the work tree already (.) when inside the hook, the absolute path is the current working directory, or $PWD. No need to fiddle with GIT_WORK_TREE at all.